
Ceiling fans are a practical addition to any home, offering improved airflow and reducing energy costs. However, installing a ceiling fan requires careful attention to detail to ensure safety and efficiency. This guide will walk you through the process and highlight when to rely on professional services for the best results.
Tools and Materials You’ll Need
- Ceiling fan kit
- Screwdriver set
- Wire cutters/strippers
- Voltage tester
- Ladder
- Electrical tape
- Mounting bracket (if not included)
Step-by-Step Guide to Ceiling Fan Installation
1. Choose the Right Location
Before you begin, select an appropriate location for your ceiling fan. Ensure the ceiling can support the fan’s weight and that there is proper clearance from walls and furniture.
2. Turn Off the Power
For safety, turn off the power to the existing light fixture or wiring circuit at the electrical panel. Use a voltage tester to confirm that no electricity is flowing.
3. Remove the Existing Fixture
Carefully detach the existing light fixture, if any, from the ceiling. Make sure to disconnect all wires and cap them with wire nuts to prevent accidental contact.
4. Install the Fan’s Mounting Bracket
Secure the mounting bracket included in your ceiling fan kit. This is crucial for supporting the fan’s weight. If you’re unsure about your ceiling’s strength, consider consulting our Electrical Installation Service for assistance.
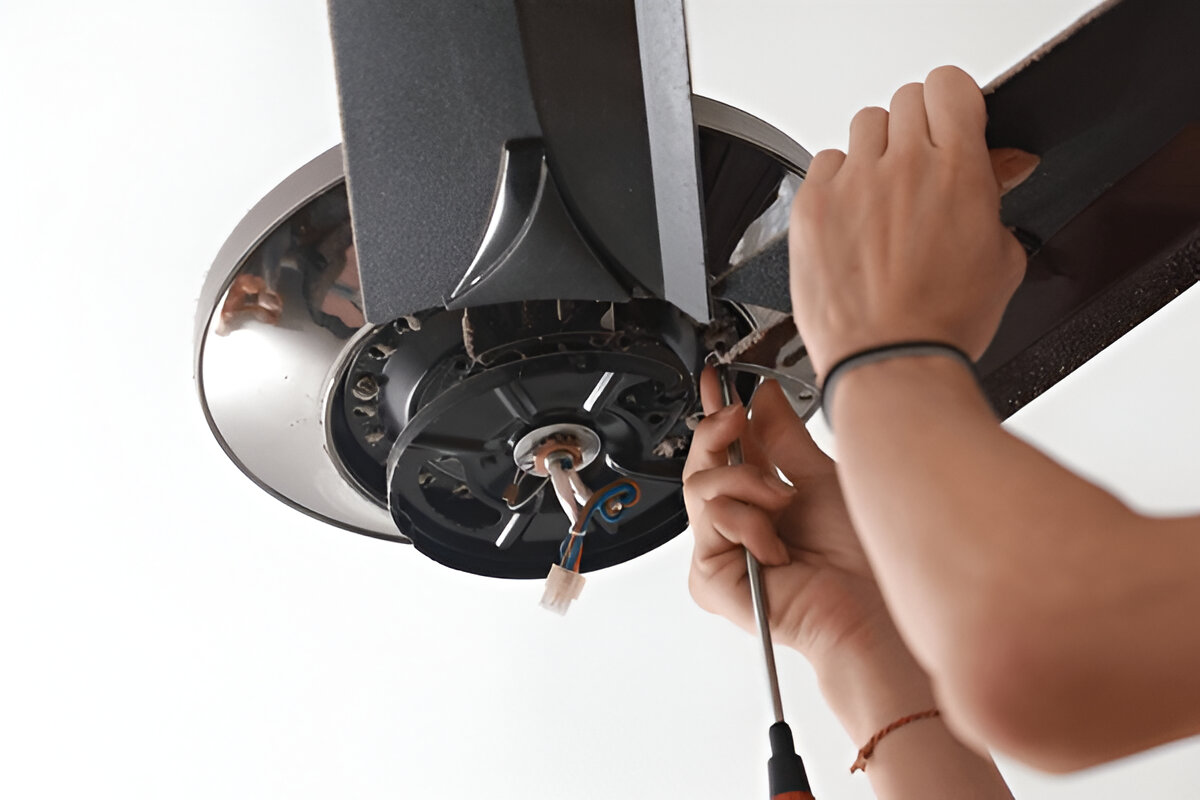
5. Connect the Wiring
Match the wires from the fan to the existing ceiling wires:
- Black (fan motor) to black
- Blue (fan light) to blue
- White (neutral) to white
- Green (ground) to the grounding wire
If you need help with wiring, our Professional Electrical Circuit Services can ensure safe and accurate connections.
6. Attach the Fan Blades and Components
Follow the manufacturer’s instructions to attach the fan blades, light kit, and other components. Make sure all screws are securely tightened to prevent wobbling.
7. Test the Fan
Once everything is assembled, turn the power back on and test the fan. Check for proper operation of both the fan and light. If you encounter issues, our Electrical Repairs in Rowlett team can troubleshoot and fix the problem quickly.
Benefits of Hiring Professionals
While installing a ceiling fan can be a DIY project, there are instances where professional help is recommended:
- If your home requires new wiring or an upgraded circuit, consider our Commercial Electrician Services.
- For areas lacking a suitable power source, our Electrical Outlet Installation can provide the necessary support.
- Need to add lighting? Explore our Electric Lighting Installation solutions for seamless integration.
Ensure Safety with Expert Help
Ceiling fan installation involves working with electrical components, which can be risky without proper knowledge. For homeowners in Rowlett, our Electrical Panel Services ensure your system is equipped to handle the load.
By choosing W3 Electric, you gain peace of mind knowing your home’s electrical needs are handled by skilled professionals. From repairs to installations, we are here to make your projects safe and hassle-free.
Need assistance with your ceiling fan installation? Contact W3 Electric today for reliable and efficient service!